In this post, you can learn how to use the free edition of Dialogflow (known as Dialogflow Essentials) and add a FREE chatbot to your WordPress website. This tutorial is targeted towards non-developers and those that do not have a baseline on designing or structuring chatbots. I’ll walk you through the fundamentals, then finally show you how you can create your own chatbot from scratch.
I was fortunate enough to be part of a small start-up organization inside of a larger organization a few years ago to help standup an enterprise chatbot. At the time, there was some skepticism on what a chatbot could do for an enterprise business. Like most scrappy startups, our team forged ahead to at least complete a prototype and ship a chatbot and see how users would interact with it. The data that we got from the chatbot was astounding, and it allowed us to refocus content, marketing, and other project IT efforts to the areas that people were asking about, not necessarily what we deduced people would need.
As my night job, I run an online marketing company. When I say company, it’s just me. I love taking big strategies and breaking them down to smaller strategies and sharing it with small business owners so they can implement it themselves. A chatbot, when done in a low-fidelity way (which is 100% possible) can prove to any organization of any size to be a great starting point on getting MARKETING data and being able to better understand your customers and your audience.
Chances are, you already have a blog for your company. If you don’t, and some of your business is predicated on people discovering you online, you are missing out on a large audience. I’m going to show you how you can include a chatbot on your website or blog in less than an hour.
Why Chatbots Are Important for a WordPress Blog
Chatbots are a great way to introduce data collection for your blog. With this data, your content strategy will be tailored to providing solutions to your readers and provide them answers to what they are asking about. The ability to collect data on the verbatim questions they are asking will allow you to align your content marketing strategy using your readers words, NOT your words. This will enable you to better connect to your readers because you are now speaking in their language.
Fundamental Terms When Creating a Chatbot
As you begin chatbot design and development (I use this term loosely), there are a few terms that you may run into. I want to dispel the myth that creating a chatbot is hard. It really isn’t hard, it just takes practice to understand the terms and put them into action.
- Chatbot, Virtual Assistant, Voice Agent, Bot – These terms do have varying and subtle degrees of differences, but for the context of this tutorial, what I say chatbot or agent, I mean the dialogbox that pops up when you are entering in text to the box to get an answer. I call it chatbot, Google Dialogflow calls it an “Agent”, Microsoft calls it a “bot”,, and AWS calls it an “assistant”. For the purposes of this tutorial, chatbot and agent mean the same thing.
- Intent – The intent is the category of “responses” that the user intends to get information on. For example, if you had a blog all about animals, you could have different intents based on animal. That is the high level category.
- Entity – The entity is the sub-level category of “responses” based on the intent, BUT they can traverse intents. For every animal intent, you could have an entity for environment, number legs, and diet.
- Utterance – This is the text that the user puts in to interact with a chatbot. Often, new chatbot creators are surprised by HOW a reader will phrase a question. These “utterances” provide a wealth of knowledge in order for businesses to frame their solutions in the same language as their readers.
- Dialogflow ES vs Dialogflow CS – Dialogflow ES is a standard chatbot that is good for small, simple agents. Dialogflow CX is more advanced and better for larger complex agents (in an enterprise environment generally).
How to Create a WordPress Chatbot Using Google Dialogflow
I’ve written this tutorial for those that are non-developers. By following these instructions, anyone who knows how to copy/paste code into the WordPress header section will be able to implement a bot into their blog pretty quickly and painlessly.
Prerequisites
- Google Account
- Dialogflow Access
- WordPress Website
- Ability to add code into WordPress Header (here’s a plugin that I use)
Create a WordPress Chatbot Using Google Dialogflow
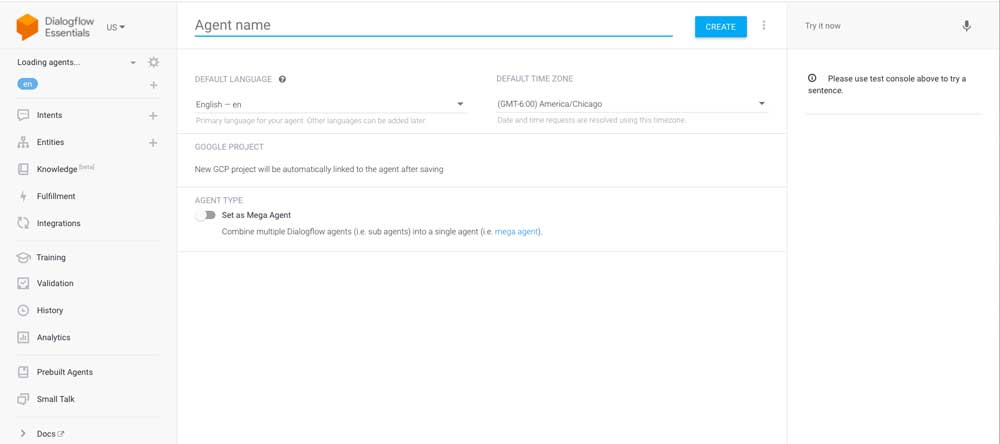
1. Set up your chatbot agent.
You will be naming your agent in this dialog box.
- Click on Create Agent
- Put in Agent Name. Click Create
- You cannot put white spaces in here.
- Choose Default Language and Default Time Zone.
2. Configure small talk and chit chat conversations.
This will provide you common question/answer pairings that users normally do when interacting with a chatbot for the first time.
- Go to Small Talk Toggle the Enable Button to On.
- Customize Small Talk as needed for your chatbot agent.
- Test out the sentence in the right panel.
- You can add variations to the questions that your chatbot agent gets in Dialogflow by adding “Answer Variants”
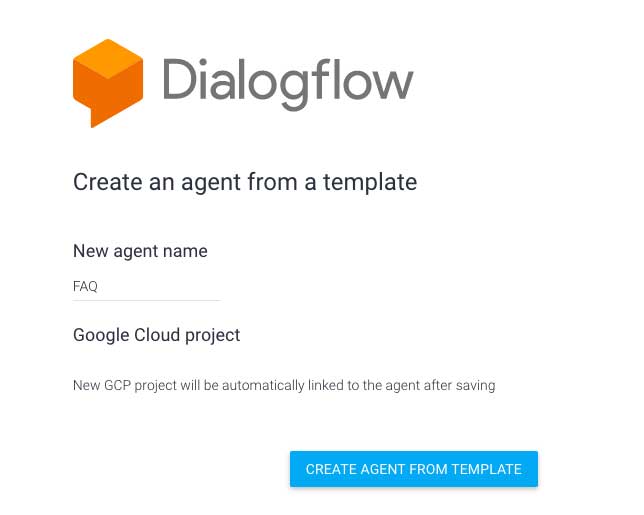
3. Utilize Prebuilt Agents to save time (like the FAQ Agent).
- Go to “Prebuilt Agents”” and choose a customizable pre-built agent that has different areas of knowledge.
- This will allow you to have the intents and entities pre-built, and all you’ll need to do is customize it.
- In this example, you can use the FAQ agent, which allows you to build an FAQ conversation that you can use.
4. Customize your pre-built agent intents and entities.
- While the default parameters may be good, reading through the pre-built intent and entities will allow you to customize variations of responses and also train your chatbot agent with the types of questions your readers could be asking.
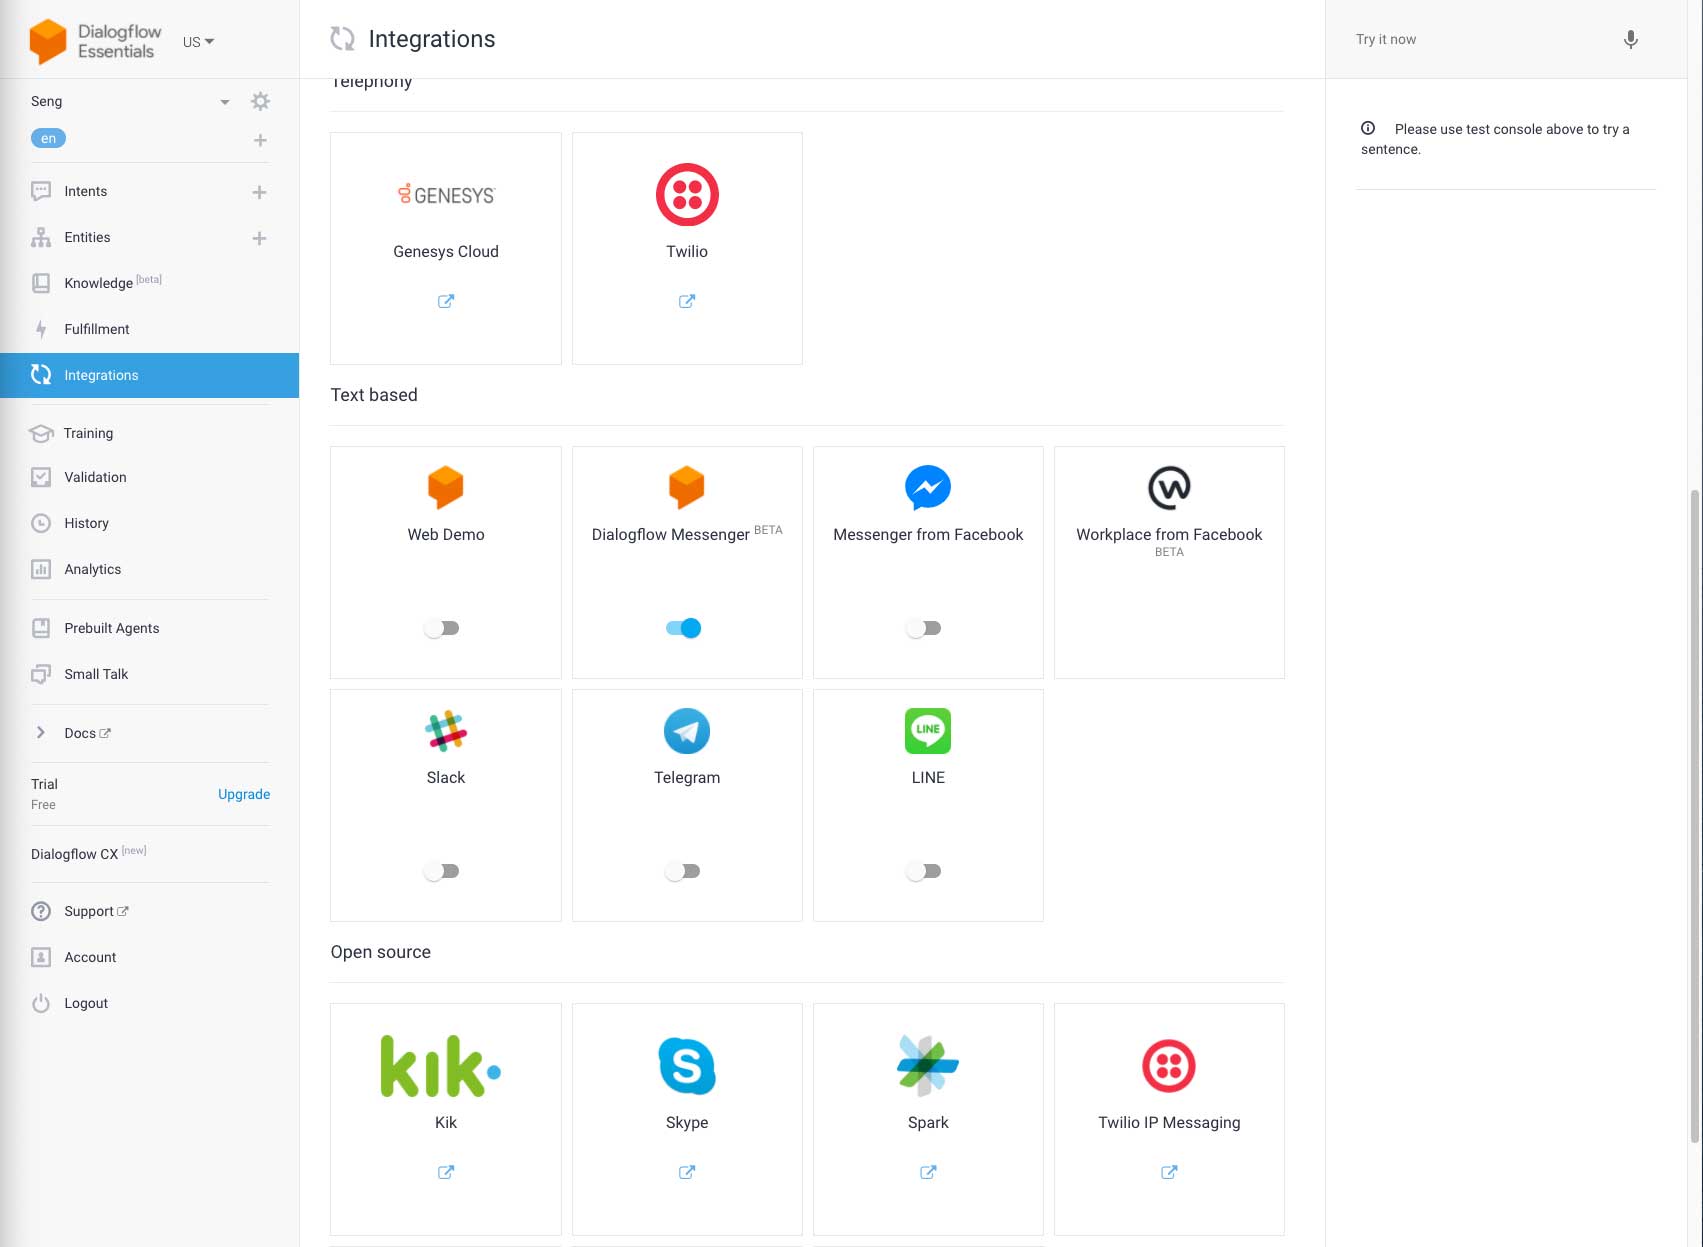
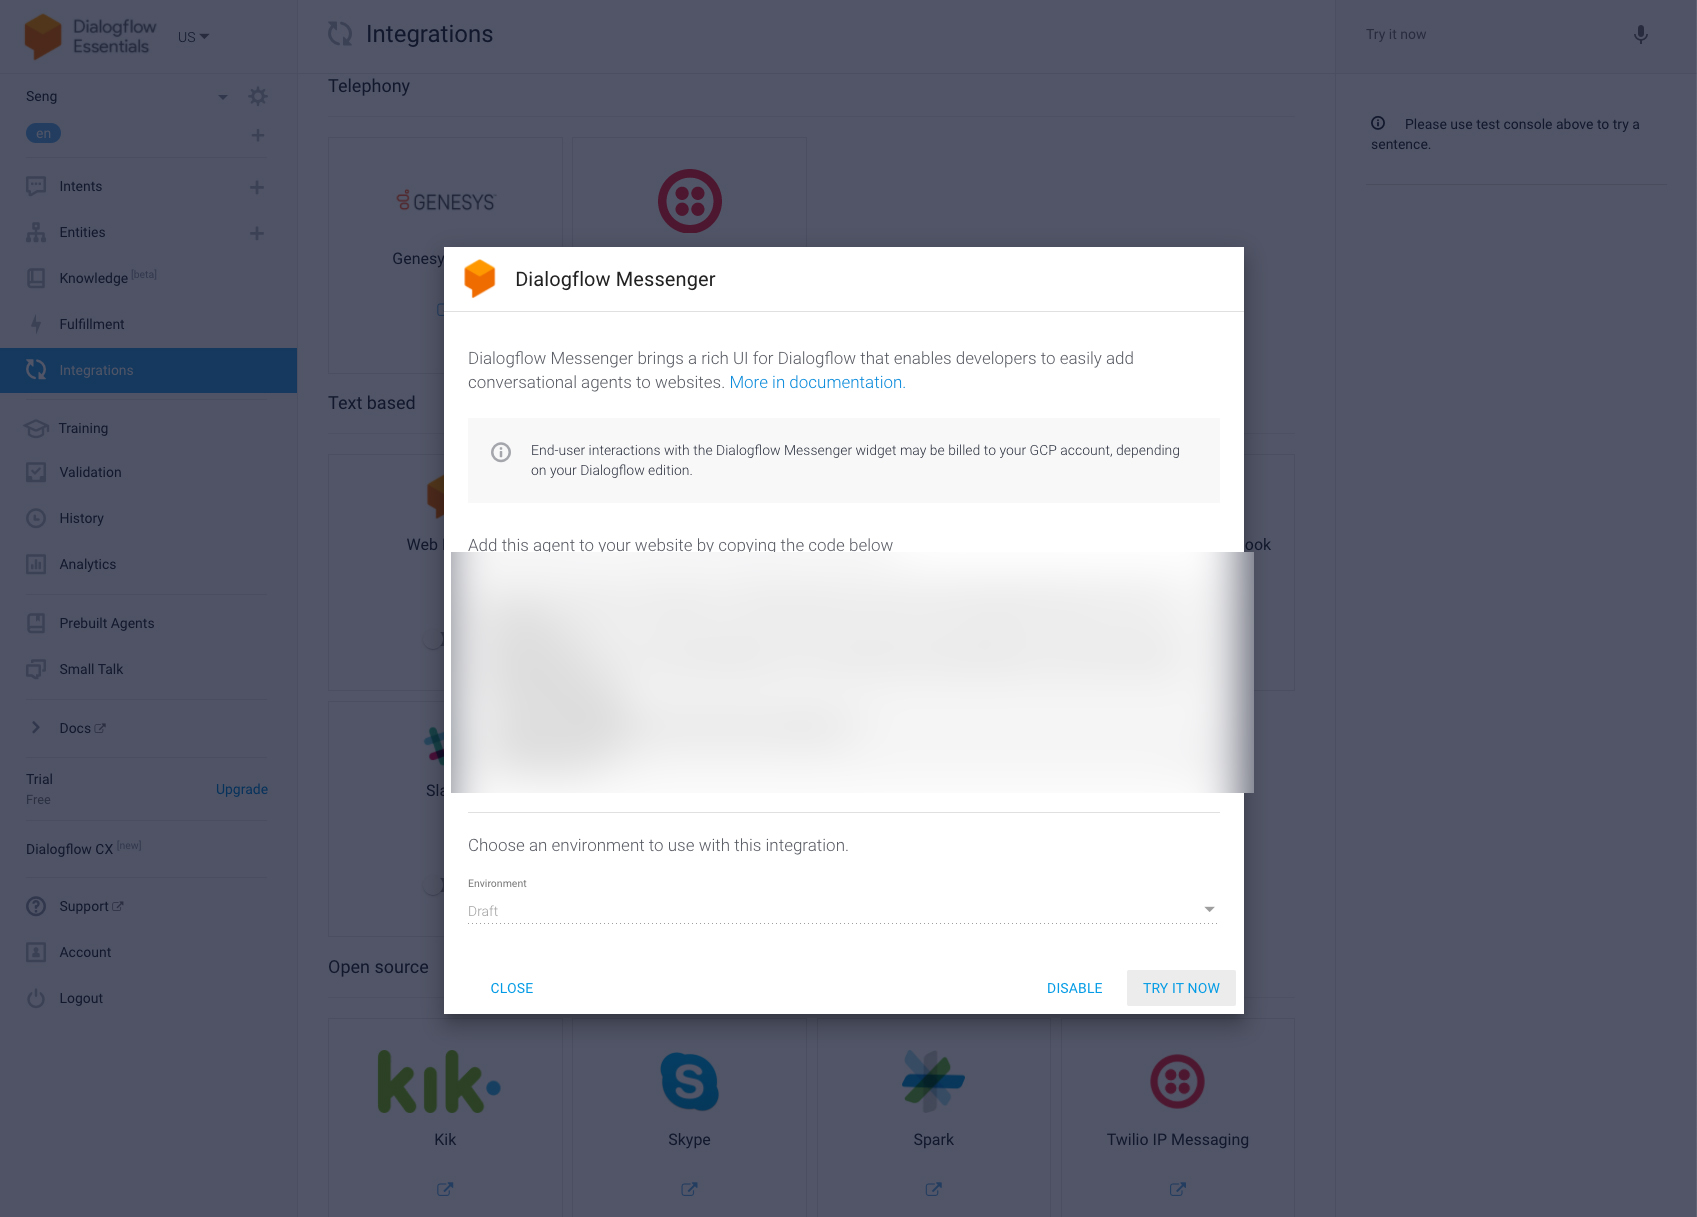
5. Grab the code for your WordPress blog.
On the left panel of Dialogflow, go to Integrations and choose Dialogflow Messenger (Beta). Ensure the blue toggle is switched to on.
- A window pops up and allows you to grab the code.
- Click “Try It Now” to see what it would look like on your website. (The bot will appear on the bottom right panel)
6. Go to your WordPress site, inject the code in.
- Refresh, clear your cache, and you should be able to see the chatbot.
- Checkout an example bot named George here.
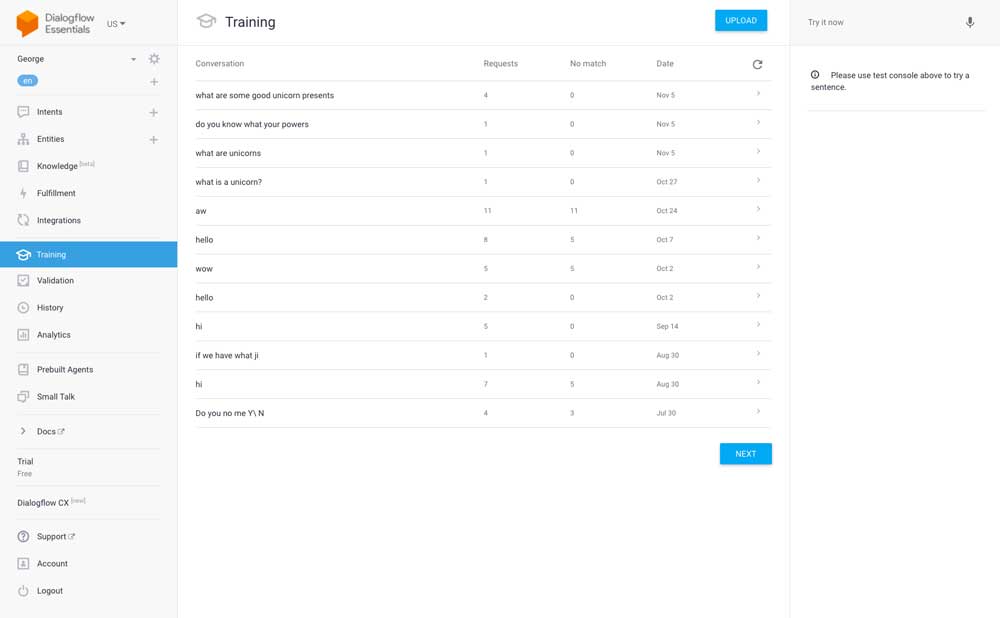
7. Once live, train and re-train your chatbot agent.
You can review and analyze metrics from your chatbot. Below are the various mental models that you can approach mental models.
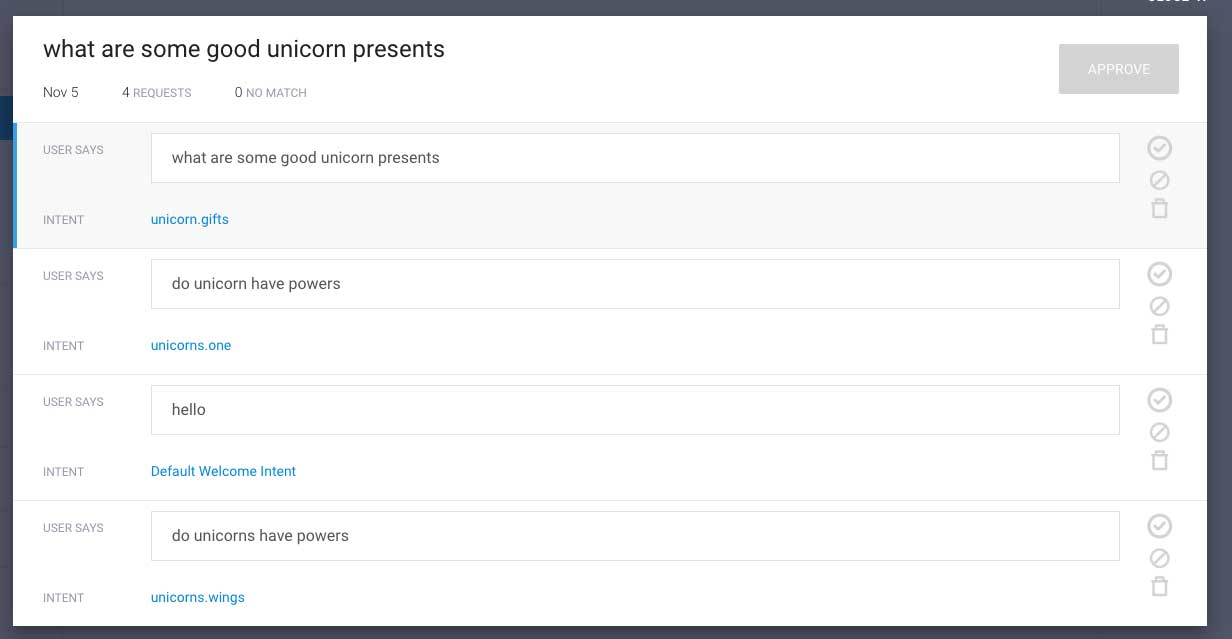
Training New Utterances
To find out interactions with your chatbots and the utterances being used, you can go to the Training column on the left. It will show you conversations.
From here, you can choose to click on the checkmark to “include” this as a question variant for an existing answer. This allows the model to be continually trained on picking out various ways this answer could be served for similar questions that are being asked.
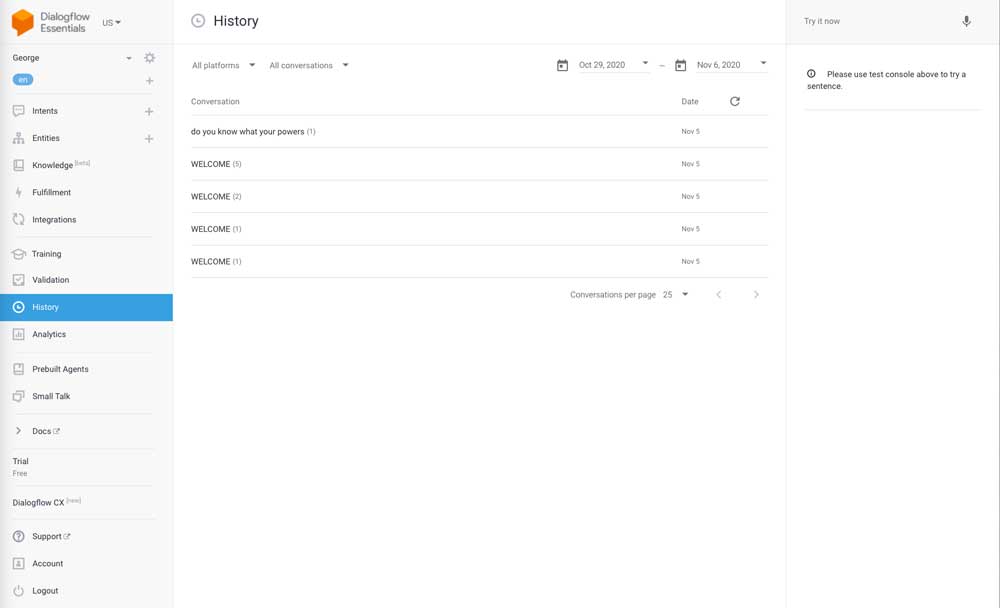
History to Understand User Workflow and Journey
To just review the entirety of the history of conversations, you can go the to the “History” section on the left panel, and just traverse through the conversations to get a better idea of how users interact with a chatbot. In the future, my hope is that this tool can provide sankey diagrams to allow businesses to see the full journey of a user from intent to intent.
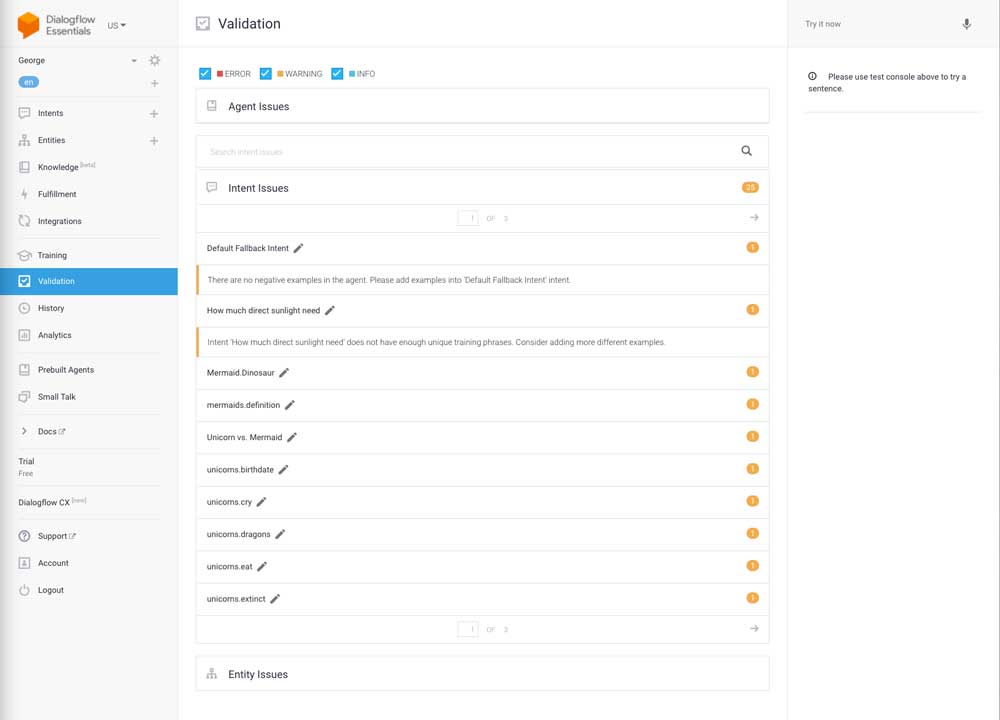
Prevention, Maintenance, and Production Issue Resolution
To do preventative fixes and error resolution, go to the “Validation” column. Traverse through both the Intent and Entity Issues section. Google will provide you some errors or warnings with some helpful information on how to fix it.
Enhancing Your Dialogflow Chatbot Agent in the Future
Dialogflow continues to be enhanced by Google. Recently, they’ve released Dialogflow CX edition, and you can find more information on the various “editions” of Dialogflow here.
Common Questions for Customizing Your WordPress Dialogflow Chatbot
How do you change the icon for your dialogflow chatbot?
You can use HTML to customize how the chat dialog box appears and behaves. Here is the documentation for it. You may need to know some minor HTML and CSS in order to customize it in detail.
Summary of Creating a WordPress Dialogflow Chatbot
I hope that this tutorial was useful in helping you create your own WordPress chatbot. Using Google Dialogflow, you’ve been able to start your journey into using data for your business to help determine what your customers need and want from your business. Getting data is the first step. Once you do that, scrubbing and understanding the data is the second step into helping your customers find the solutions they need.